Final Fantasy cosplay has evolved from niche fan art into a sophisticated craft that combines sewing skills, prop-making expertise, and character knowledge into wearable art. Whether you’re attending a major convention or stepping into a character for the first time, the barrier to entry is lower than ever, but the ceiling for quality remains impressively high. The series spans nearly four decades and multiple generations of consoles, giving cosplayers an enormous roster of beloved characters to choose from. From Cloud’s iconic buster sword to Yuna’s intricate white mage robes, every Final Fantasy character tells a story through their appearance, and that’s exactly what makes them so compelling to recreate. This guide covers everything you need to know about building a Final Fantasy cosplay in 2026, from selecting your character and sourcing materials to nailing the finishing touches that make attendees stop and take photos.
Table of Contents
ToggleKey Takeaways
- Final Fantasy cosplay combines sewing, prop-making, and character knowledge into wearable art, with accessible entry points for beginners and impressive depth for experienced crafters.
- Character selection should balance timeline, budget, and skill level—beginner-friendly characters like Yuna and Tidus can be completed in weeks, while complex builds like Sephiroth require 6–12 months of dedicated work.
- Material sourcing is critical to quality and budget; specialty fabrics from Japanese retailers, EVA foam for armor ($1–3 per sheet), and cosplay-grade paints ($8–15) deliver professional results without premium pricing.
- Proper construction workflow—including mock-ups, French seams, armor attachment via ribbon loops, and detailed prop making—prevents visible seam issues and structural problems that undermine beautiful materials.
- Final touches like character-accurate makeup, quality wigs from specialty retailers, and proper styling techniques often receive disproportionately small budgets despite their high visibility in photos.
- Community engagement through Discord servers, convention meetups, and skill-sharing transforms Final Fantasy cosplay from a solitary hobby into a collaborative experience that strengthens both individual craftsmanship and the broader gaming community.
Why Final Fantasy Cosplay Stands Out in Gaming Culture
Final Fantasy occupies a unique space in gaming culture. Unlike some franchises where character designs follow a formula, each Final Fantasy game reinvents its visual language. Cloud Strife looks nothing like Squall Leonhart, who looks nothing like Vaan, and that visual diversity makes the cosplay community thrive.
The franchise’s emphasis on character-driven storytelling means fans develop genuine emotional connections to these characters. Someone cosplaying as Aerith from Final Fantasy VII isn’t just wearing a pink dress, they’re embodying a character whose story resonated with millions. That emotional investment translates into costumes with attention to detail that separates serious cosplay from casual costume-wearing.
Convention halls at events like Anime Expo, PAX, and Japan Expo are flooded with Final Fantasy cosplayers, creating an instant community. The costumes themselves range from screen-accurate recreations to creative interpretations, meaning there’s no single “correct” way to approach the character. Whether someone wants pixel-perfect accuracy or artistic freedom, Final Fantasy cosplay accommodates both approaches.
The technical challenge appeals to crafters across skill levels too. A simple character like Tifa Lockhart’s casual outfit can be constructed in a weekend, while an ambitious build like Sephiroth’s full armor setup can occupy months of dedicated work. This scalability has made Final Fantasy cosplay genuinely accessible while still offering depth for experienced builders.
Choosing Your Final Fantasy Character: Tips for First-Time Cosplayers
Picking your first cosplay character is more strategic than just “picking your favorite.” Consider your timeline, budget, sewing experience, and access to materials before committing. A six-month timeline and $200 budget demands a very different character than a two-year plan with a $1,000 investment.
Iconic Characters Perfect for Beginners
Yuna from Final Fantasy X stands out as an excellent entry-level choice. Her white mage outfit features simple geometric shapes: a white kimono-style top, a long skirt, and a distinctive belt. The color blocking is straightforward, and mistakes in construction don’t read obviously. Fans recognize the character instantly, and the costume photographs beautifully without requiring expert-level wig styling.
Tidus offers a similarly beginner-friendly approach if you prefer masculine characters. His casual outfit, shorts, a sleeveless top, and sneakers, uses basic patterns available from major sewing sites. The distinctive mark on his face is handled with face paint rather than complex construction. The loose fit of the garment means precision tailoring matters less than color accuracy.
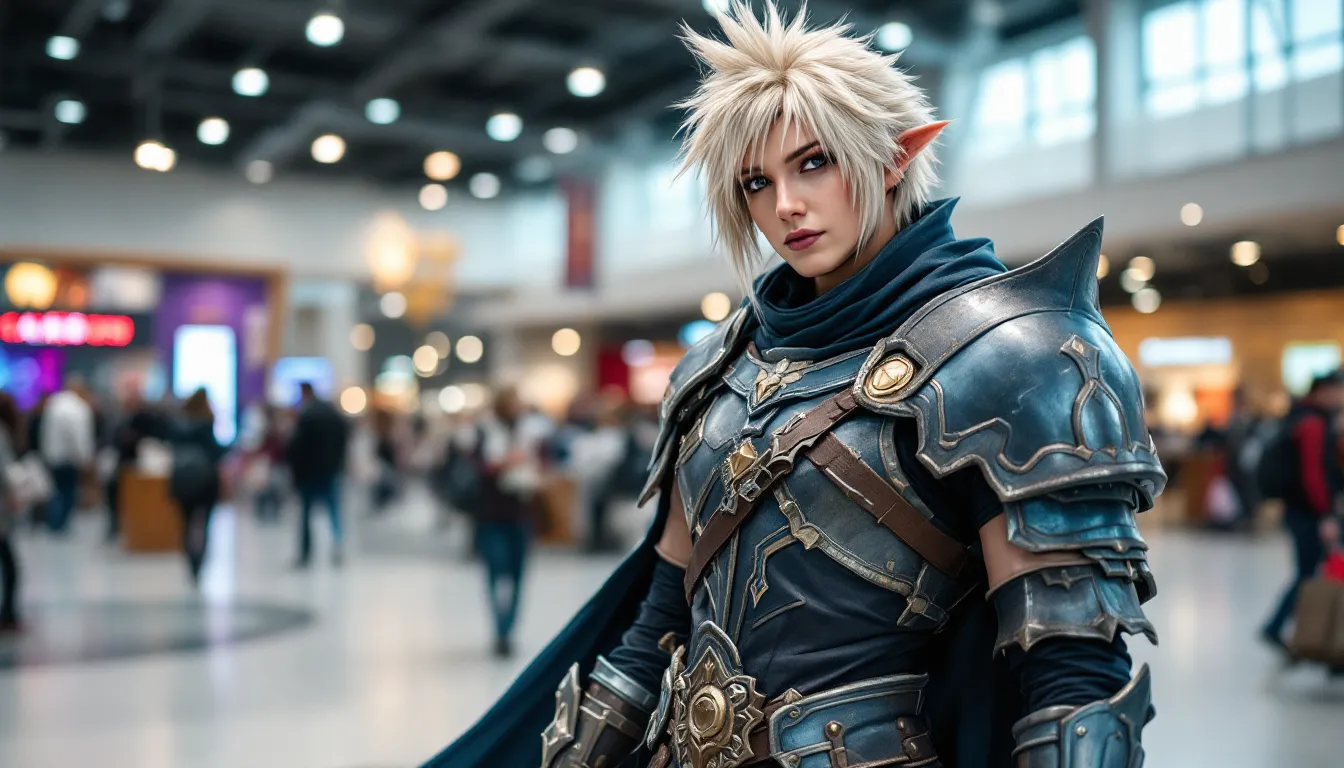
Zidane from Final Fantasy IX works well for builders with modest sewing experience. His jacket has straightforward construction even though the busy design, and the pants are standard. The monkey tail requires stuffing and basic hand-sewing, and the gloves can be purchased and modified rather than built from scratch.
These characters share common advantages: relatively simple color palettes, minimal armor components, and recognizable silhouettes even from a distance. They represent realistic first projects that won’t discourage beginners with overwhelming complexity.
Complex Builds for Experienced Cosplayers
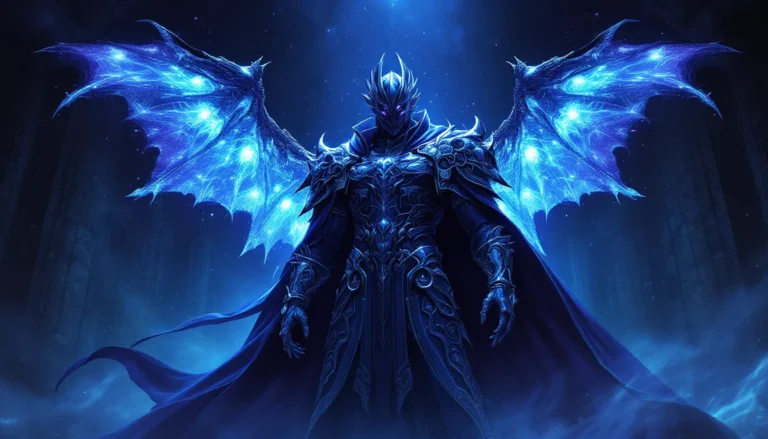
Sephiroth represents the opposite end of the spectrum. His one-winged angel form demands armor-making expertise, prop fabrication skills, and advanced painting techniques. The massive buster sword requires proper weight distribution and materials that won’t snap under convention center walking. Even experienced builders typically dedicate 6–12 months to a full Sephiroth build.
Rinoa from Final Fantasy VIII, particularly her sorceress form, requires advanced wig styling, intricate beading, and custom armor work. The combat outfit includes multiple layered pieces, asymmetrical construction, and details that demand precision. Builders often spend 8–10 weeks on this alone.
Lightning from Final Fantasy XIII appeals to experienced builders who want to showcase technical skills. Her Savior outfit features complex armor integration, custom fabrication for the weapon, and a sophisticated paint job to achieve metallic effects. The design looks simple from a distance but demands expert execution to capture accurately.
Garnet from Final Fantasy IX, specifically her sorceress form, combines sewing complexity with armor-making demands. The icy-blue gown requires fabric manipulation and draping skills, while the elaborate headpiece demands 3D modeling or advanced foam work.
Experienced builders should select characters that genuinely excite them because these projects require sustained motivation. The technical challenge alone won’t carry a build if the character doesn’t resonate emotionally. Consider whether you want to focus on one specialized area, armor, fabric work, prop-making, or develop a comprehensive skill set across all disciplines.
Essential Materials and Where to Source Them
Material sourcing determines both the final quality and the budget efficiency of a cosplay build. Knowing where to find specific fabrics, foams, and paints prevents the false economy of buying inferior materials or paying premium prices for readily available alternatives.
Fabric Selection and Quality Considerations
Final Fantasy costumes demand different fabric types depending on the character. Cotton blends work well for casual outfits, but structured pieces like Yuna’s top or Lightning’s armor-adjacent clothing benefit from medium-weight woven fabrics with some body. Sateen and cotton twill provide durability and drape better than basic quilting cotton.
Satin and silk alternatives suit characters with elegant or flowing garments. Yuna’s skirt benefits from dupioni silk or a quality satin that catches light without appearing costume-y. Real silk runs $15–25 per yard: Japanese fabric retailers and specialty shops like Dharma Trading offer quality alternatives at $8–12 per yard that perform nearly identically.
Stretch fabrics matter for fitted pieces. Tidus’s sleeveless top and pants benefit from 4-way stretch knit fabrics that allow movement without excessive baggy folds. Athletic mesh and spandex blends available through Spoonflower or Mood Fabrics ($10–18 per yard) provide better results than standard cotton.
Fabric sourcing should happen at least two months before construction. Major retailers like Joann Fabrics (US) and The Fabric Store (UK) offer reliable basics but limited specialty options. Japanese fabric retailers like Rakuten and YKS, while requiring international shipping, provide authentic textures that match official artwork. Local fabric shops often carry unique materials that online retailers don’t stock.
Consider color matching carefully. Official artwork sometimes uses colors that differ from in-game models due to lighting and compression. Reference multiple sources, the original game, remake versions, official artwork, and high-quality cosplay photos, to confirm color before purchasing. Most cosplayers regret buying that first yard of “close enough” fabric.
Armor, Props, and Weapons: Building Authenticity
EVA foam has become the standard for armor and props because it’s lightweight, affordable ($1–3 per sheet), and forgiving for beginners. Worbla’s Thermoplastic is more durable and takes finer detail but costs $8–12 per sheet and requires heat-forming equipment. For most first-time armor builds, EVA foam provides better bang for the buck.
Props and weapons divide into purchased-and-modified versus fully custom-built categories. Cloud’s buster sword, for example, can be purchased as a display replica ($40–80) and then modified with upgraded paint and weathering, or built from scratch using foam and fiberglass ($60–120 in materials, 20+ hours labor). The purchased route works well for complex shapes: custom-building saves money on simple geometric shapes.
Paint and finishing dramatically impact perceived quality. Cosplay-grade paints like Glow-Up Paints and Flexible Leather Paints ($8–15 per bottle) adhere better to foam and fabrics than standard acrylics. Weathering, dry-brushing, and clear-coating add production value that makes cheap materials read as intentional design choices. A $15 foam pauldron painted professionally looks better than a $60 unpainted prop piece.
Internal retailers like TNT Cosplay Supply, Etsy specialty shops, and direct factory suppliers (particularly from China via Alibaba) offer pre-made components. A pre-cast armor chest piece runs $30–80 and saves weeks of work, though customization often costs more than building from scratch. Experienced builders typically only use pre-made pieces for components they’ve legitimately spent hundreds of hours on before and want to skip on this build specifically.
Budget allocation typically breaks down as: 30% fabric and garment construction, 25% armor and props, 20% wig and accessories, 15% paint and finishing, 10% contingency. This ratio shifts based on character, someone building Sephiroth’s armor should allocate 45% to armor, while a fabric-heavy character like Garnet might justify 40% on materials and sewing supplies.
Building the Costume: Step-by-Step Crafting Process
Construction requires a logical workflow that respects garment assembly basics while accommodating costume-specific demands. Rushing the build process creates visible seam issues, misaligned pieces, and structural problems that undermine even beautiful materials.
Sewing Basics for Garment Assembly
Start with pattern selection or modification. Commercial patterns from Simplicity, McCall, or Vogue provide a foundation that requires substantial modification for Final Fantasy characters. Finding a pattern for a simple dress that matches your character’s silhouette, then adjusting sleeves, neckline, and length, takes less time than drafting from scratch.
Mock-ups should happen in cheap muslin or scrap fabric, especially for first-time builders. A mock-up catches fit issues before cutting expensive materials. Someone building Tifa’s clothing should definitely mock-up the garment to confirm chest width and arm hole positioning before cutting final fabrics.
Seam construction matters more than beginners realize. French seams (enclosing raw edges within the seam itself) look professional and photograph well, but take 20% longer than standard flat-felled seams. For costumes that will be photographed closely, French seams in visible areas justify the time investment.
When attaching armor or props to garments, use internal loops of grosgrain ribbon rather than direct attachment to fabric. This prevents stress damage when the costume shifts during wearing. A metal pauldron should attach via ribbon sewn to interior seams, not directly to the shoulder seam of the garment.
Interface and stabilization prevent floppy details and maintain shape. Areas around armor attachment points, necklines, and areas subject to stress should have proper interfacing. Using interfacing lighter than recommended prevents costumes from looking stiff: using it heavier makes fabrics move unnaturally.
Prop Making and Detailing Techniques
Prop construction should follow from architectural design. Before cutting foam, sketch the piece from multiple angles and build a rough 3D prototype from cardboard. This prevents building a sword guard that’s too small for the blade or a pauldron that doesn’t align with the shoulder.
Foam fabrication workflow:
- Design and scale pieces against reference images
- Create cardboard prototype and test fit
- Cut foam using reference pieces as guides
- Heat-form complex curves using a heat gun (start at low temperatures)
- Sand foam pieces with progressively finer grits (80→120→220 grit)
- Prime foam with flexible primer or wood filler
- Paint base colors
- Add details through weathering, dry-brushing, and hand-painting
- Clear-coat for protection
Blade weapons require special attention to balance. A sword that’s blade-heavy becomes exhausting to hold and looks awkward in posed photos. Adding weight toward the hilt or using lighter materials (foam instead of fiberglass) maintains visual impact without physical strain. A properly balanced 5-foot foam buster sword should feel comfortable to hold for extended periods.
Attachment mechanisms should be invisible and secure. Weapons should attach to hands or backs through hidden straps, not grip the prop so tightly that paint chips from handling. Pauldrons should rest on shoulders via internal ribbon attachment, allowing the wearer to move without the piece shifting.
Armor Crafting for Realistic Appearance
Armor reads as authentic when it follows realistic weight distribution and articulation. A pauldron that points straight up looks cosplay-ish: one that slopes naturally follows shoulder anatomy. Reference actual armor photos or historical pieces to understand how protective gear actually sits on the human body.
Layering creates depth that single-panel armor lacks. A chest piece doesn’t float as one monolithic object, it has a base layer, secondary plates, strapping, and details. Building these elements separately and assembling them creates dimensional realism that painted-on details can’t match.
Edging and weathering transform raw foam into battle-worn gear. Foam naturally reads as “foam” unless the edges are sealed and detailed. Heat-sealing edges with a soldering iron, then dry-brushing dark paint into edges and weathering patterns, makes cheap foam read as expensive metal.
Articulation mechanics matter when armor covers joints. Shoulder armor should allow arm movement: leg armor shouldn’t restrict walking. Testing movement while building prevents creating a stunning costume that physically can’t be worn. Someone building Sephiroth should test that the shoulders allow full arm rotation and that the armor doesn’t dig into the torso when sitting.
Proper ventilation holes should exist where they logically would, under arms, at hips, anywhere foam sits flush against the body during wear. This isn’t about accuracy: it’s about wearability. A costume that can’t be worn comfortably won’t be worn well.
Makeup, Wigs, and Finishing Touches
A carefully constructed costume falls flat if the wig looks synthetic and the makeup appears costume-store cheap. These finishing elements often receive disproportionately small budgets even though their visibility.
Character-Accurate Makeup Application
Final Fantasy characters feature distinctive makeup that ranges from subtle (Tidus’s thin face mark) to elaborate (Sephiroth’s dramatic eyes and marks). Reference official artwork, 3D model rips, and high-quality cosplay photos to understand the makeup placement and intensity.
Foundation work should match the character’s skin tone, not necessarily the wearer’s natural skin tone. If a character has an unnaturally pale complexion (like Sephiroth or Garnet), using foundation two shades lighter than natural skin creates authenticity. This might feel uncomfortable but photographs correctly and matches the character’s design intent.
Face marks and unique features require precision. Tidus’s thin line across his face should be applied with liquid eyeliner or makeup pen rather than trying to freehand it. Sephiroth’s eye makeup demands testing with eyeshadow and eyeliner multiple times before convention day. Practice on a non-convention day: the convention center isn’t where anyone wants to discover that their eyeshadow formula smudges under heat.
Contouring and shading add dimensionality that photographs better than flat makeup. Characters with sharp facial features (like many Final Fantasy protagonists) benefit from subtle contouring that emphasizes cheekbones and jaw definition. This requires practice and shouldn’t be skipped even if time feels tight, convention lighting is harsh and exposes flat makeup immediately.
Lip color matters more than many builders realize. A character in official artwork with distinct lip color should have that reflected in cosplay makeup. This is one area where matching exactly makes an enormous visual difference.
Styling and Maintaining Cosplay Wigs
Wig quality determines whether a costume reads as professional or amateur from 10 feet away. A $15 wig from a fast-fashion retailer will never look good: a $40–80 wig from specialty retailers like Arda Wigs, GriffinMane, or Epic Cosplay provides the base quality needed for good styling.
Wig selection should match the character’s hair texture first, color second. Someone building Yuna needs a long, straight wig with minimal volume: Zidane needs a short, spiky blonde wig: Lightning needs a detailed updo-style wig. Selecting the right base wig saves enormous styling work compared to forcing a wrong wig into the right shape.
Styling techniques:
- Straightening: Heat straighteners work on most synthetic wigs (confirm the fiber type first) and transform plastic-looking waves into sleek hair
- Curling: Wig-safe curling irons or steam can add waves without damaging synthetic fibers
- Teasing and volume: Backcombing at the roots creates volume that matches anime-style hair design
- Securing loose strands: Wig glue holds flyaways and stray fibers in place during events
- Adding details: Accessories, dye markers, and even hand-painted streaks customize wigs to match specific character designs
Wig maintenance extends the lifespan and keeps the cosplay photo-ready. Store wigs on proper wig stands rather than crumpled in a bag. Between events, shake out loose fibers and use dry shampoo to refresh appearance. After sweaty convention days, gentle washing in cool water with conditioner removes body oils and restores shine.
Contact lenses complete character-accurate makeup when the character has distinctive eye colors. Colored contacts run $20–40 per pair and should be applied with care if the wearer isn’t accustomed to them. Practice wearing contacts during low-stakes events before wearing them during major photo opportunities. Some contacts cause watery eyes that ruin makeup throughout the day.
Final touches, jewelry, gloves, belts, small props, should be assembled in a designated costume bag. Nothing ruins a convention experience like arriving at your photo shoot and discovering the prop bracelet at home. Minor accessories often read on camera even though being invisible from 10 feet away and deserve similar attention as major costume pieces.
Bringing Your Cosplay to Life at Events
A finished costume in your closet differs dramatically from a worn costume at a convention. Event preparation, logistics, and active wear determine whether the costume survives the day looking polished or degrading into sad shapes and lost details.
Preparing for Conventions and Gaming Events
Event preparation should begin a week before the convention. Do a full dress rehearsal wearing everything, costume, shoes, wig, makeup, accessories, and move around for 30 minutes to identify any comfort issues. Chafing seams, armor that shifts, wig slippage, and makeup settling patterns will reveal themselves during dress rehearsal, not on event day.
Comfort considerations directly impact how well the costume looks in photos. Someone wearing an uncomfortable costume moves stiffly and photographs poorly. Identify problem areas during rehearsal: does the armor rub the underarm? Does the wig slip when turning? Do the shoes cause blisters after 30 minutes of walking? Solving these problems before the event prevents spending the convention day adjusting costume pieces instead of enjoying the experience.
Packing strategy matters enormously. Create a costume bag separate from personal belongings with: the complete costume, backup accessories, costume repairs kit (matching thread, needle, safety pins, super glue, wig clips), makeup touch-up supplies, and a clean towel. Nothing feels worse than discovering a missing glove halfway through the convention. Overpacking one cosplay bag beats scrambling to find costume pieces at the last minute.
Weather adaptation prevents soggy costumes and ruined makeup. Hot conventions demand moisture-wicking base layers under costumes and makeup primer that resists sweat. Cold events require layering that doesn’t bulk under costumes. Rain protection should be considered for outdoor photo locations, costumes that survive a light rain photograph better than costumes that are already slightly damp.
Arrival planning should allow 1–2 hours before photo shoots for final preparation. This isn’t excessive: it accounts for makeup application, last-minute detail adjustments, and mental preparation before being in character. Arriving frazzled and rushed results in photos where the wearer appears stressed rather than excited.
Character physicality should be practiced beforehand. Moving like the character, their posture, mannerisms, and typical expressions, makes photos and convention interactions feel authentic. Someone cosplaying Lightning should have her stance and expression ready: someone as Vivi should embody the character’s reserved but spirited personality. This isn’t acting school, just deliberate preparation for owned moments.
Photography Tips for Showcasing Your Work
Photography quality dramatically impacts how the costume is perceived online. A mediocre costume photographed well outperforms an excellent costume photographed poorly. Understanding lighting, positioning, and composition levels up the visual impact of months of work.
Lighting fundamentals: Golden hour (first hour after sunrise, last hour before sunset) provides soft, directional light that flatters costumes and photographs beautifully. Hard midday sun creates harsh shadows that obscure details and make fabrics look flat. Overcast days provide diffuse light that works adequately for costume photography. Avoid backlighting unless intentionally creating silhouette effects.
Posing composition:
- Avoid standing flat-on to camera: Angled poses (45–60 degrees) photograph better and show costume dimensions
- Use hands intentionally: Holding props, adjusting costume pieces, or using natural gestures creates dynamic photos instead of stiff standing poses
- Show movement: Walking shots, action poses mimicking combat moves, and dynamic stances convey character personality
- Demonstrate details: Actively position the costume to show armor details, complex construction, or unique features rather than hoping the camera catches them
Camera settings matter when using manual mode. Fast shutter speeds (1/250s or faster) freeze movement and prevent blur during action poses. Lower f-stop values (f/2.8–4.0) blur backgrounds and make the cosplayer pop from surroundings. ISO should be kept as low as possible while maintaining proper exposure, high ISO introduces grain that degrades detail visibility in costumes.
Post-processing restraint prevents photos from looking unrealistic. Basic adjustments, slightly increasing saturation to match costume vibrancy, minor exposure corrections, and careful color grading, enhance photos without obviously digital manipulation. Over-processing creates an artificial look that undermines the craftsmanship of the costume.
Video content deserves consideration alongside still photos. A short video showing the costume in motion reveals armor movement, wig flow, and overall wearability that still images miss. Posting 15–30 second clips alongside photo galleries provides fuller documentation of the build.
Cosplayers should work with photographers who understand costume photography. Convention photographers understand angles, lighting tricks, and posing that flatter armor and detailed work. Even 30 minutes with a dedicated photographer yields significantly better results than hoping for good photos from passing convention-goers.
Common Mistakes to Avoid
Certain mistakes repeat across Final Fantasy cosplay builds and can be prevented with awareness. Learning from others’ experiences saves both time and money.
Undersizing armor creates costumes that look cramped and uncomfortable. Builders often make armor pieces smaller than reference images to save material and reduce weight. This results in pauldrons that barely clear the shoulder, chest pieces that restrict arm movement, and overall silhouettes that don’t match the character. Reference images should be treated as accurate sizing guidelines, not approximations to shrink down.
Neglecting undergarments and base layers results in visible skin gaps and unprofessional appearance. Many characters have layered clothing that requires proper undergarments or base layers to look complete. Someone building Yuna’s outfit without a white base layer underneath shows through areas that should appear solid. Budget time for creating proper foundations.
Mismatching paint finishes makes props read as costume pieces rather than in-character gear. If part of a sword has a flat matte finish and another section has glossy shine, the piece appears unfinished. Consistent paint finishes (all metallic, all matte, intentionally weathered in specific ways) create coherence that polished-in-some-places costumes never achieve.
Overspending on one element while neglecting others creates visually unbalanced results. A $500 handmade buster sword paired with a $20 costume from a retailer looks worse than a $100 prop sword paired with a well-constructed $400 costume. Budget should be proportional to the costume’s overall needs.
Using reference images from fan art exclusively instead of balancing with official artwork creates costumes that don’t match character design intent. Fan artists take creative liberties that aren’t part of the official character. Referencing multiple sources, official artwork, in-game models, remake versions, creates more accurate builds.
Skipping the practice wear before conventions means discovering comfort issues during expensive events. A wig that slips halfway through the convention, armor that chafes, or makeup that settles unevenly ruins the experience. An hour of practice wearing prevents hours of frustration.
Rushing the finish work undermines quality construction. Props benefit from proper painting, weathering, and clear-coating. Costumes benefit from finished seams, proper hem work, and detail attachment. Skipping finish work makes rushed builds obvious from a distance.
Joining the Final Fantasy Cosplay Community
Final Fantasy cosplay communities exist everywhere from local Discord servers to massive international groups. Connecting with these communities provides resources, encouragement, and collaboration opportunities that elevate the hobby.
Online communities gather on Reddit (r/cosplay, r/FinalFantasy), Discord servers dedicated to cosplay crafting, and platform-specific groups like TikTok and Instagram where cosplayers share builds. These spaces provide feedback on work-in-progress pieces, troubleshooting when techniques fail, and genuine encouragement that sustains motivation through long builds.
Final Fantasy fan communities specifically often include cosplay sub-groups. Someone interested in cosplaying from Final Fantasy XIV might join the FFXIV community focused on character discussion: these groups often have dedicated cosplay channels where players share their builds and coordinate meetups at conventions.
Convention meetups connect cosplayers in person. Most major conventions have organized Final Fantasy cosplay meetup times and locations. Meeting other people who’ve built similar characters, sharing construction tips, and coordinating group photos creates memories that outlast the convention itself. A solo cosplay is fun: a group photo of multiple Final Fantasy characters is something special.
Collaboration opportunities extend beyond costume-specific work. Photographers often seek cosplayers for portfolio building: other cosplayers collaborate on group cosplays: crafters team up on ambitious builds that exceed individual capability. Being active in cosplay communities opens these collaborative doors.
Skill sharing accelerates improvement. Someone struggling with armor painting benefits from watching experienced builders’ techniques. Crafters who’ve solved specific problems offer solutions that took others months to figure out independently. The generosity of experienced builders toward newer crafters keeps the community welcoming and inclusive.
Contributing to the community, sharing your own build process, offering feedback on others’ work, answering questions from beginners, strengthens the entire ecosystem. Cosplay communities thrive when members contribute, not just consume. Someone posting step-by-step build photos helps dozens of future builders who face similar challenges. That’s the cycle that makes gaming communities resilient and welcoming.
Final Fantasy cosplay, at its core, is about celebrating characters and stories that mattered to you. The technical skill matters, the materials matter, and the finished costume matters, but the community makes it matter more. Building within a supportive group of people who understand why you spent three months hand-stitching pleats into a skirt transforms a hobby into a genuine passion shared with others who get it.
Conclusion
Final Fantasy cosplay represents a unique intersection of gaming fandom, technical craftsmanship, and creative expression. The series’ visual diversity ensures there’s a character suited to every skill level and interest, whether someone wants a weekend project or a months-long ambitious build. The barrier to entry has never been lower thanks to online communities sharing knowledge freely, affordable materials becoming increasingly accessible, and conventions celebrating cosplay as serious craft rather than Halloween costume.
The foundation outlined here, from character selection and material sourcing through construction, finishing, and event presence, provides the framework that transforms fabric and foam into recognizable character recreation. But the actual magic happens when someone slips into the finished costume and embodies a character they’ve spent hundreds of hours bringing to life. That’s the moment when cosplay becomes more than construction: it becomes performance, celebration, and connection.
Gaming communities thrive when members create, share, and support each other. Final Fantasy cosplay represents all three. Every finished costume that appears at a convention, every progress photo shared in community spaces, and every convention photo that gets circulated online strengthens the broader community. The technical skills that Final Fantasy cosplay demands, precision sewing, armor fabrication, prop-making, makeup artistry, transfer to other creative pursuits and hobbies. The confidence that comes from completing an ambitious build radiates beyond conventions.
There’s never been a better time to start or expand Final Fantasy cosplay. The games remain beloved and accessible, reference materials are abundant, materials are cheaper and more convenient than ever, and the community is genuinely welcoming to builders of all skill levels. Whether someone is attending their first convention or their fifteenth, whether they’re building their first cosplay or their fiftieth, Final Fantasy characters will continue offering compelling designs worth recreating in 2026 and beyond.